


A pretty common reverse-engineering CTF challenge genre for the hard/very-hard bucket are virtual machines. There are several flavors to this*, but the most common one is to implement a custom VM in a compiled language and provide it together with bytecode of a flag checker. This was the case for the More Control task from Byte Bandits CTF 2023 – the task this entry is about. The typical approach to these kind of challenges is to reverse the binary and "look" at the bytecode enough to understand the opcode format and write at least a disassembler (and ideally reimplement the VM in Python), and then to analyze what's going on in the bytecode itself. Sometimes however you can take a shortcut. This post is a semi-complete write-up of a side-channel based solution for the aforementioned task.
* Other flavors include: 1) not providing the VM binary, but providing network access to some "system" running on it where you can run bytecode you provide and observe results; 2) not providing the VM binary; this hard-core sub-genre is rare and requires players to determine opcode encoding by just looking at unknown bytecode, which they can't even execute; 3) instead of a flag checker you get something that writes out the flag, but it takes literal years to write it out - so it's a typical "optimize me".
Side-channel attacks
You can safely skip this section if you know what a side-channel is.
A side-channel is basically a somewhat obscure and somewhat hidden weak source of information about an observed process. For example, the main channel of information for a program is what you see as the output on the screen. A side-channel however could be e.g. CPU usage graph, computer's power usage, electro-magnetic emission, or electronic component sound emission. And – or maybe first and foremost – measuring elapsed time. Here's a typical example (pseudo-code... well, that's actually Python):
def check_password(good_password, entered_password):
  if len(good_password) != len(entered_password):
    return False

  for i in range(len(good_password)):
    if good_password[i] != entered_password[i]:
      return False

  return True
Now assume that:
- you don't know the correct password,
- you can enter any password you like, how many times you like,
- you can measure in great resolution how long does it take for the check_password function to execute.
The first check there is the password length. If the length doesn't match, we short-circuit into a function exit in form of return False. If it matches however, a bit more code gets executed – loop setup, range "generator" creation, checking the first password letter, etc. This means that if we try a wrong password with the right length the measured execution time will be longer than if we try a wrong password with the wrong length.
Trying            Measured time
"a"               73 ns
"aa"              72 ns
"aaa"             71 ns
"aaaa"            74 ns
"aaaaa"           73 ns
"aaaaaa"          73 ns
"aaaaaaa"         72 ns
"aaaaaaaa"        73 ns
"aaaaaaaaa"       72 ns
"aaaaaaaaaa"      133 ns
"aaaaaaaaaaa"     71 ns
"aaaaaaaaaaaa"    73 ns
In the example above, it's pretty clear that the 10-character candidate password caused the execution to be almost twice as long. From this we can easily infer that the password should be 10 characters long. Note that measuring time above has some noise in it – usually that noise is much worse, but let's keep this simple.
Next step is to brute-force the password character-by-character. When we hit the right letter at the given position, we'll hear a characteristic *click* sound observe time measurement increase for the given character.
Trying            Measured time
"aaaaaaaaaa"      134 ns
"baaaaaaaaa"      131 ns
"caaaaaaaaa"      130 ns
"daaaaaaaaa"      155 ns
"eaaaaaaaaa"      132 ns
...
"yaaaaaaaaa"      130 ns
"zaaaaaaaaa"      133 ns
And eventually we would arrive at the whole password.
Of course in real world no one™ does that kind of comparisons (first of all because passwords are hashed, but let's ignore that for a second). Usually folks use just plain old return good_password == entered_password which would internally use some form of optimized multiple-bytes-at-the-same-time comparisons – the "multiple-bytes" part there basically disables the character-by-character attack. Additionally, folks that know a bit about cryptography would use a constant-time comparison schema – no side-channels here.
On top of that measuring execution time using a wall clock (i.e. real human time) is hard, as the operating system usually has multiple other threads running which put strain on various pieces of the computer system (which influences execution time), on top of that random events might interrupt – and therefore prolong – the execution (e.g. network packets arriving), etc. You might even not have access to precise enough timers to measure what you need. Or not have enough access to the comparison process to be able to observe in decent detail the actual part of the code that you need.
While there are techniques to deal with some signal-to-noise-ratio loss, eventually sometimes the stars just need to align for a side-channel attack to be feasible. As they did in case of the More Control CTF challenge.
Analysis of the VM and bytecode
The provided binary was written in Rust. I still have very little Rust reverse-engineering experience, so I expected this to be a pain, though it wasn't that bad. The method I used to find the VM loop (yes, there's usually a loop with a large switch-case or jump-tables in such challenges – that's easy to spot) was the following:
- tun the challenge in GDB,
- wait for it to print "Give flag:",
- press Ctrl+C to break execution and check all the functions in the call stack.
$ gdb -q ./main
Reading symbols from ./main...
(No debugging symbols found in ./main)
(gdb) r ext.bin
Starting program: main ext.bin
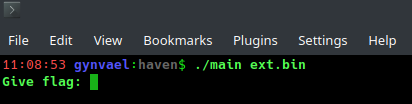
Give flag: ^C
Program received signal SIGINT, Interrupt.
0x00007ffff7e54992 in __GI___libc_read ...
(gdb) where
#0 0x00007ffff7e54992 in __GI___libc_read ...
#1 0x000055555541b42d in ?? ()
#2 0x000055555541b2e2 in ?? ()
#3 0x000055555541c2c0 in ?? ()
#4 0x0000555555407c04 in ?? ()
#5 0x0000555555407fc3 in ?? ()
#6 0x00005555554087a9 in ?? ()
#7 0x0000555555419dae in ?? ()
#8 0x0000555555407fb2 in ?? ()
#9 0x00007ffff7d69d90 in __libc_start_call_main ...
#10 0x00007ffff7d69e40 in __libc_start_main_impl ...
#11 0x000055555540743a in ?? ()
(gdb)
There are only a couple of functions in the call stack and the VM loop one was pretty easy to spot:
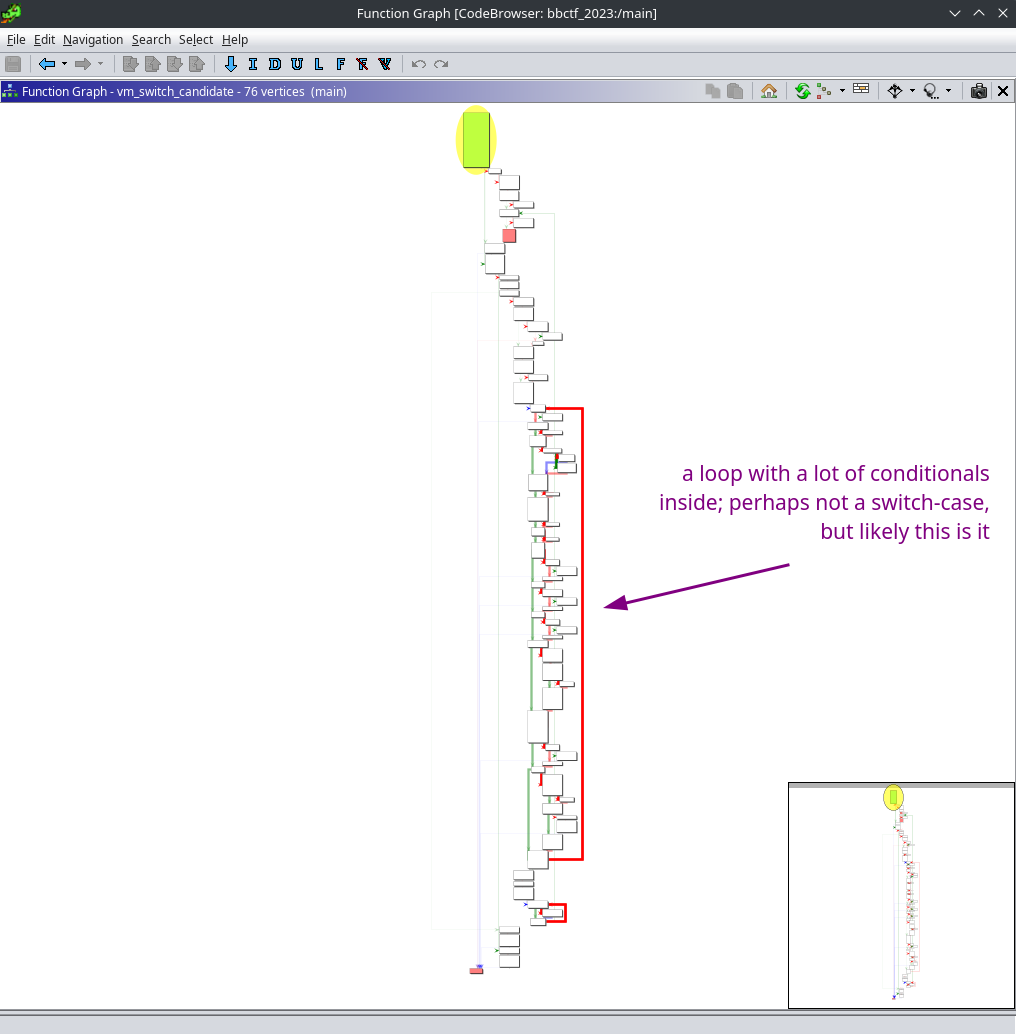
Having found the loop I started reading it. The picture that I was slowly developing in my head was one of a constant-size 32-bit opcode (which btw is obvious when you look at the bytecode file) that's constructed as a bit field of ALU operations, register transfers, memory transfers, and jumps/calls/and such. Because rustc apparently loves to use registers the code is a bit convoluted, so I was only half paying attention to it.
At the same time I was trying to figure out if I can learn anything from the provided bytecode:
$ hexdump -C ext.bin
00000000  00 10 00 24 ff ff 00 00  00 00 00 44 71 05 00 00  |...$.......Dq...|
00000010  02 80 00 10 00 00 01 24  ff ff ff ff 01 00 04 10  |.......$........|
00000020  02 80 00 10 00 00 01 24  00 00 00 00 00 80 20 10  |.......$...... .|
00000030  00 00 01 24 0e 00 00 00  00 80 08 10 00 00 01 24  |...$...........$|
00000040  04 00 00 00 00 00 04 40  00 a0 00 10 00 00 01 24  |.......@.......$|
00000050  01 00 00 00 00 10 04 10  00 40 80 40 10 40 40 10  |.........@.@.@@.|
...
00001af0  7b 00 00 00 00 00 00 00  63 00 00 00 6f 00 00 00  |{.......c...o...|
00001b00  72 00 00 00 72 00 00 00  65 00 00 00 63 00 00 00  |r...r...e...c...|
00001b10  74 00 00 00 00 00 00 00  77 00 00 00 72 00 00 00  |t.......w...r...|
00001b20  6f 00 00 00 6e 00 00 00  67 00 00 00 00 00 00 00  |o...n...g.......|
00001b30
As mentioned before, it's pretty obvious that everything is 4-byte aligned, including individual letters of words like "correct" and "wrong" visible at the end of the dump. Actually the data/constant analysis itself proved super useful – here's a snippet from my notes that includes data offsets (in 32-bit dwords) as well as places where the offsets are referenced in the bytecode (courtesy of the partial disassembler I was already writing):
0x648 <-- data start
05e7: regA = 0x648
this is split into two 0-terminated regions: 32 dwords and 21 dwords
these are followed by this:
("this" btw is ANSI escape codes - color ;p)
067e: 1B 5B 33 31 6D 00
0684: 1B 5B 33 32 6D 00
068a: 1B 5B 30 6D 00

0x68f <-- "Give me flag" string
0571: regA = 0x68f
058f: regA = 0x68f

0x69b <-- "makes sense"
046b: regA = 0x69b
0491: regA = 0x69b
05bb: regA = 0x69b

0x6a8 <-- "0123456789abcdef"
00b7: 0x6a8

0x6b8 <-- "flag{"
0457: 0x6b8
"}" as immm is a 0x4ac btw

0x6be <-- "correct"
0617: regA = 0x6be

0x6c6 <-- "wrong"
061d: regA = 0x6c6
Reading the VM code it was pretty obvious where are the registers, especially the instruction pointer aka program counter (around 0x107a5d it was put in rdi, but I think it was in eax most of the time). It was a bit less obvious which exact x86 registers double as the VM's registers, but I identified r9 (denoted regA), r10 (regB), r11 (regC), r14 (redD), rbx (regAPPLE), r15d (regE), rbp (regPEAR), as well as two temporary registers r13 (regBEAR) and rdx (regGOAT). Please excuse my naming schema.
The typical follow-up steps would include a somewhat long process of polishing the disassembler implementation to correctly decode all opcode, mark jumps and labels, etc. However, I decided to check if this challenge is maybe susceptible to a side-channel attack using the length of execution as the oracle. One of the things I've noticed that solidified my decision was the lack of bitwise-OR opcode – that's because a typical constant-time comparison schema uses it. This of course doesn't mean that one cannot implement a constant-time comparison without it (one can use bitwise-AND or ADD for example), but it's a pretty decent signal (especially that bitwise-AND was also missing).
Pivot to side-channel attack
The first step was to patch the main binary to add instruction counting, as this would be a perfect resolution timer, ideal for my purposes. To do this I selected a patch of land where to insert my code and prepared the patch and a patching script (hint: always make a patching script as this allows simple repeatability needed for fast iteration on the patch and easy bug fixes). For the first one I selected some assert-looking code at the beginning of the VM loop:
                       LAB_00107a5d
00107a5d 89 c7           MOV        EDI,vm_ip
00107a5f 48 39 fe        CMP        opcode_count,RDI
00107a62 0f 86 8d        JBE        LAB_00107df5
         03 00 00
00107a68 48 89 7c        MOV        qword ptr [RSP + 0x48],RDI
         24 48
...

Decompiled version of the code above:
do {
  reg_tmp = (uint)reg_bear;
  if (vm_ip >= opcode_count) {
    /* output an error */
    goto EXIT;
  }
  *(ulong *)(&stack0x00000018 + lVar3) = vm_ip;
  ...
The patch code looks like this (note: for offset calculation I've used a typical GDB base, but that doesn't matter):
[bits 64]
[org 0x555555407a5f]

inc qword [rel $ + (0x55555565f000 - 0x555555407a5f)]
What the code does is just increment a global 64-bit unsigned integer every VM loop iteration. For the location of that global I've chosen the end of the writable memory page that houses .data and .bss sections.
The patcher (hint: add patch recompilation into the patcher so you don't have remember to do it manually):
#!/usr/bin/python
import os

with open("main", "rb") as f:
  d = bytearray(f.read())

os.system("nasm patch.nasm")

with open("patch", "rb") as f:
  patch = f.read()

while len(patch) < 3 + 6:
  patch += b'\x90'

assert len(patch) == 9

# File offset for 0x107a5f default virtual address is 0x7a5f.
d[0x7a5f:0x7a5f+9] = patch

# Output executable will be called ./brute
with open("brute", "wb") as f:
  f.write(d)
The next step was to make a GDB script that would perform a single run of the application and output my instruction counter at the end. Initially I was using a "first write after a read" as an exit condition, but eventually – due to other stuff apart from "wrong" or "correct" being written out – I switched to "exited the VM loop" as the exit condition.
set height 0
set disassembly-flavor intel

# Breakpoint for read opcode - it will stop right after "Give flag: "
# is printed out.
break *0x555555407bb1

# Note that it expects the flag candidate to be in "flag" file.
r kext.bin < flag

# Disable the read opcode breakpoint since it would only get in the way.
disable 1

# "write" as exit condition
#break *0x555555407ce1
# "VM loop exit" as exit condition
break *0x555555407d92

# Continue.
c

# After breaking print out the instruction counter and exit.
print *(unsigned int*)0x55555565f000
quit
Here's an example of how to run this once:
$ echo "asdf" > flag; gdb -q --batch -x count.gdb ./brute
Breakpoint 1 at 0x555555407bb1
...
Give flag:
Breakpoint 1, 0x0000555555407bb1 in ?? ()
Breakpoint 2 at 0x555555407d92
wrong
Breakpoint 2, 0x0000555555407d92 in ?? ()
$1 = 131132974
A debugging session is active.

        Inferior 1 [process 52230] will be killed.

Quit anyway? (y or n) [answered Y; input not from terminal]
The $1 = 131132974 line there contains the instruction counter. That's A LOT of instructions for a VM btw – enough that I actually proceeded to double-check if everything works once I saw it. On the flip side the VM was pretty slow, so I shouldn't have been as surprised (I still kinda expected to find a sleep() somewhere in the VM loop).
Having this the next step was to implement a brute-forcing script in Python. The script would create a flag candidate, put it in the "flag" file, run GDB, extract the instruction counter from the output, and reason based on the result. Here's the initial script:
#!/usr/bin/python
import subprocess
import sys

def test(flag):
  with open("flag", "w") as f:
    f.write(flag)

  output = subprocess.check_output([
    "gdb", "-q", "--batch", "-x", "count.gdb", "./brute"
    ])

  o = output.decode()
  #print(o)

  for ln in o.splitlines():
    if ln.startswith("$1"):
      ln = ln.split("=")[1]
      return int(ln)

ALPHABET = (
  '0123456789_{}abcdefghijklmnopqrstuvwxyzABCDEFGHIJKLMNOPQRSTUVWXYZ '
  '!"#$%&\'()*+,-./:;<=>?@[\\]^`|~'
)

def go(password):
  wrong = test(password + chr(0x07) + "\n")
  print("Wrong Index: ", wrong)
  for i in ALPHABET:
    res = test(password + i + "\n")
    if res != wrong:
      print(i, res)
      return password + i
    else:
      print(i, end="")
      sys.stdout.flush()

  sys.exit("??? NOT FOUND ???")

password = ""

while True:
  print("Current Result:", password)
  password = go(password)
It takes a few minutes per position, which is acceptable even if not perfect. And using it I've managed to solve the challenge find only the "flag{" prefix...
$ python brute2_s.py
Current Result:
Wrong Index:  131132930
0123456789_{}abcdef 131132952
Current Result: f
Wrong Index:  131132974
0123456789_{}abcdefghijkl 131132996
Current Result: fl
Wrong Index:  131133018
0123456789_{}a 131133040
Current Result: fla
Wrong Index:  131133062
0123456789_{}abcdefg 131133084
Current Result: flag
Wrong Index:  131133106
0123456789_{ 194062010
Current Result: flag{
Wrong Index:  194048184
0123456789_{}abcdefghij[...]^`|~??? NOT FOUND ???
So it turned out that flag checking is actually split into a couple of checks (I might mix up the order here, since I don't claim to fully understand it):
- First the prefix "flag{" is checked byte-by-byte.
- Secondly there's a check if the flag body (the thing inside curly braces) is 48 characters long.
- Thirdly there's a check if "}" is at the end.
- After all these pass, there are 3 billion instructions executed that do... nothing important?
- Eventually there's a byte-by-byte check of the 48-character body.
Debugging this took a mix of educated guessing, side-channel attack on the length, and looking from the code using my partial disassembler (which was bad, but still provided a bit of information). So eventually I could byte-by-byte brute-force flag's body.
Kinda. The issue now was that – due to that 3 billion instruction slow down – each character took around 10-20 minutes to get. For a 48-character body, that's hours of waiting.
Given the above I started experimenting on the side with modifying ext.bin to jump over the busy loop (and some of the other checks). Eventually I arrived at this patch:
#!/usr/bin/python
import struct

with open("ext.bin", "rb") as f:
  data = bytearray(f.read())

def patch_dword(dword_idx, v):
  v = struct.pack("<I", v)
  idx = dword_idx * 4
  data[idx:idx+4] = v

"""
Candidate addresses selected by looking at the disassembly:
0x5c5
0x5cf
0x5dd
0x5e7
0x5f5
0x5ff
0x60d
"""

# Patch what I think is a return address constant being put on the stack with
# one of the selected candidates.
patch_dword(0x046d + 1, 0x5cf)

# Note the file name - the GDB script needs to be changed to reflect this.
with open("kext.bin", "wb") as f:
  f.write(data)
The script above speeded up the execution to the initial level, so after around 15 more minutes I finally got the flag and the first blood on the challenge.
Current Result: flag{th1s_was__a_usele55__rewrite_of_c0ntr0l__to_ruaa} 51
Wrong Index:  194064622
abcdefghijklmnopqrs 194064656
Current Result: flag{th1s_was__a_usele55__rewrite_of_c0ntr0l__to_rusa} 52
Wrong Index:  194064656
abcdefghijklmnopqrst 204550859
flag{th1s_was__a_usele55__rewrite_of_c0ntr0l__to_rust}
Here's the final script:
#!/usr/bin/python
import subprocess
import sys

def test(flag):
  with open("flag", "w") as f:
    f.write(flag)

  output = subprocess.check_output([
    "gdb", "-q", "--batch", "-x", "count.gdb", "./brute"
    ])

  o = output.decode()
  #print(o)

  for ln in o.splitlines():
    if ln.startswith("$1"):
      ln = ln.split("=")[1]
      return int(ln)

"""
# Length brute.
for i in range(1, 65):
  res = test("flag{" + ("0"*i) + "}\n")
  print(i, res)
"""

ALPHABET = (
  'abcdefghijklmnopqrstuvwxyz_0123456789ABCDEFGHIJKLMNOPQRSTUVWXYZ '
  '!"#$%&\'()*+,-./:;<=>?@[\\]^`|~{}'
)

# Update this from time to time while running so you can restart without
# loosing too much state.
password = "flag{aaaaaaaaaaaaaaaaaaaaaaaaaaaaaaaaaaaaaaaaaaaaaaaa}"
KNOWN = 5

def go(password, pos):
  wrong = test(password[:pos] + '\x07' + password[pos+1:])
  print("Wrong Index: ", wrong)
  for i in ALPHABET:
    password = password[:pos] + i + password[pos+1:]
    res = test(password + "\n")
    if res != wrong:
      print(i, res)
      return password
    else:
      print(i, end="")
      sys.stdout.flush()

  sys.exit("??? NOT FOUND ???")

for i in range(KNOWN, 5+48):
  print("Current Result:", password, i)
  password = go(password, i)

print(password)
I guess the moral of this story is to always look for places that allow you to be lazy use a side-channel attack, as it might simplify / speed up the solution.
By the way...
If you're looking for a deep dive into the topics of Kubernetes security, check out our new hands-on workshop, starting June 2026 → Practical Deep Dive into Kubernetes Security
Overall it was a pretty awesome task – doubly so because I could execute a side-channel attack and I really like these. Eventually this was the only solution to this challenge and it allowed us to win the Byte Bandits CTF 2023 by a narrow margin – good game! Additionally, shout out to my teammates who helped with the initial recon on this challenge!
P.S. Here's the challenge's source code.
P.P.S. You might also want to check out Julien Voisin's article „Crackme Solving for the Lazies” on page 44 (that's 43 in PDF) of Paged Out! #1 for a pretty handy Python auto-solver script for RE tasks "vulnerable" to timing side-channels (and another cool auto-solving script!).
Comments:
Add a comment: